Using Mozart Data with GitHub
Incorporate GitHub into your analytics workflows
Overview
Mozart Data customers can use Git to store, record changes, and manage transform versions. You can configure Git integration by following the instruction below. Note: We currently integrate with GitHub and do not support GitLab.
Customer Prerequisites
Before you begin, please make sure to involve:
- A GitHub organization admin user at your company
- An existing repo or new repo
Instruction
1. Decide on the target repo in your GitHub organization
Your Mozart transforms will need to sync to an existing repo, or you can create a brand new repo. Additionally, you will need to install the Mozart Data GitHub App – in a GitHub organization or under a GitHub individual user:
- If you are using an existing repo, the App will not edit/delete any other files; it will just write Transforms to a mozartdata/transforms directory.
- If you create a new repo, you need to ensure that it has at least one commit. In the GitHub UI, checking Add a README file will create that initial commit for you:
2. Install the Mozart Data GitHub app
Install the Mozart Data GitHub app by visiting this page: Mozart Data App
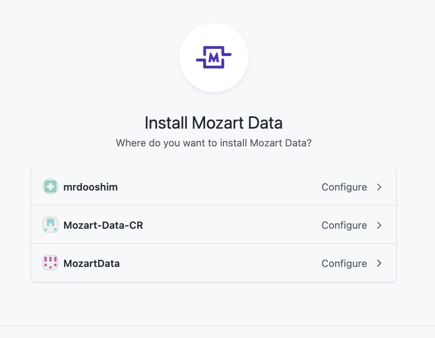
2-1. Choose whether to install the repo under a User or under an Organization:

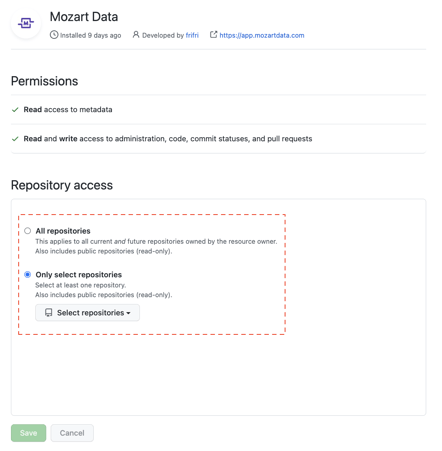
2-2. Decide whether to grant the App access to all repositories or just selected ones.
Note: We recommend installing just on the one repo you have made or designated as the main repo for Mozart Data use.

2-3. Allow only squash commits in your repo.
Mozart Data listens to webhooks from GitHub as your code changes. When a pull request is merged, a single squash commit will send all changes to Mozart at once, whereas other commit strategies will send multiple messages to Mozart and could be applied in the wrong order, resulting in the wrong code getting to Mozart. You should enable squash commits only for your repo as noted here. This strategy will ensure that Mozart does not apply stale changes to your Transform.

3. Contact Mozart Data to sync your Transform files
Once you are all set up, contact Mozart Data with the repo owner and repo name, and we can associate it with your company. We will sync your existing Transforms to the repo and enable further syncs as Transforms change in Mozart and/or GitHub.
4. You’re all set!
Once Mozart has successfully associated Mozart account with your GitHub repo, we will reach back out to you. This process is quick and will typically be done within the same business day.
Important Notes & Best Practices
GitHub Profile & Account Settings
- For better collaboration with your teammates, we suggest that you:
- Add your full name to your GitHub profile (Go to https://github.com/settings/profile). Otherwise, only your username will be shown on the Transform Versions page
- Uncheck “Keep my email addresses private” (Go to https://github.com/settings/emails). Otherwise, only your privatized email will be shown on the Transform Versions page
Permissions
-
Allow commits to the default branch without a pull request. Transform changes will be written to the repo’s default branch (i.e. main). By default, this is allowed. The easiest setting is leaving off the requirement for pull requests within the branch protection rules for the default branch:

-
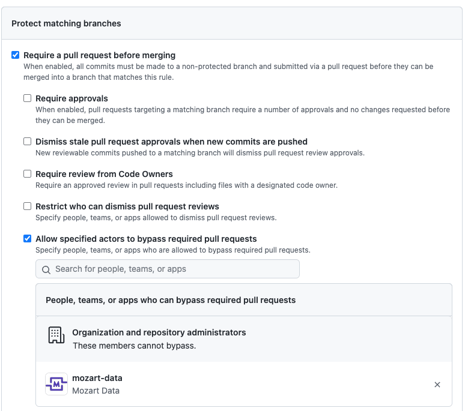
But you could also require pull requests from everyone besides the Mozart Data bot by enabling Allow specified actors to bypass required pull requests:

Features
- In the current release, users will be able to write and edit Transforms between Mozart and GitHub only. To create or modify schedules, go to the Transforms page in Mozart’s UI
- For all new transforms being created in GitHub, you must manually run them from and create schedules in Mozart UI
- GitHub commit history will only show commit messages starting the point after the repo transfer has complete
- Make sure the transform files end in .sql. Otherwise, the sync will not be successful
- To create a new transform file in a brand new schema via GitHub, go to “Add file” —> “Create new file” —> define the schema name, and use the forward-slash (/) after "/transforms" prior to the transform name